11 decisions to settle before your kitchen remodel starts
Make your kitchen remodel a success by settling these eleven decisions before the work starts, from cabinet layout to permits and lead safety.
 Prepared by Fiona Eckhart
- 7 min. to read
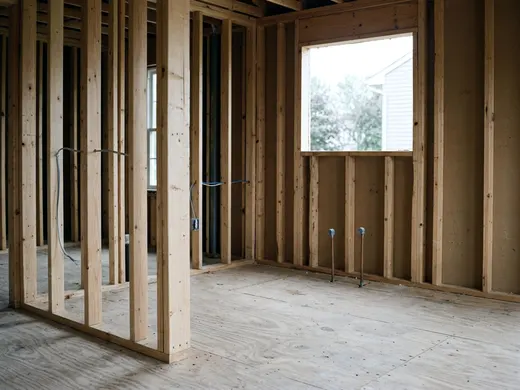
A kitchen remodel takes careful planning before anyone picks up a sledgehammer. Lock down your layout, materials and permits early. This keeps the project on track and minimizes surprises.
Eleven decisions need an answer before demolition starts. Each one affects a bid, an order or an inspection later.
1. Keep the footprint or move walls
The median spent on a kitchen remodel over 2021 to 2023 was $8,000. This data comes from the 2023 American Housing Survey. The survey counted 5.0 million kitchen remodels with total spending of $83.1 billion during those years. A smaller budget often points toward keeping your existing layout.
Moving exterior walls or bumping into the dining room can trigger structural work. The contractor may have to reroute plumbing and run new wiring, and moving walls can require new structural beams. That can raise material costs and extend the timeline.
Staying within your current footprint controls the scope. Tell your contractor right away if you want to alter the room size.
The footprint decides how many cabinets you need and where the utilities go. Make this your very first decision.
2. Choose appliances before ordering cabinets
Pick out your refrigerator, stove and oven before you finalize your cabinet order. Appliance dimensions dictate the entire cabinet layout. You need exact width, depth and height measurements to ensure everything fits. A standard refrigerator requires a different opening than a counter-depth model.
If you plan to sketch your kitchen plan, you need these specifications first.
Selecting these units early prevents ordering cabinets that leave a gap. It also keeps you from crowding the room with appliances that stick out too far. Match them against standard kitchen cabinet sizes to build your layout.
Think about how the doors open. A refrigerator door needs clearance to swing wide enough to pull the crisper drawers out. Lock in your appliance models so the cabinet maker can build the boxes to match exactly.
3. Fix the sink, dishwasher and range locations
The placement of your main work areas drives the room design. The sink, stove and refrigerator form a triangle. This pattern dictates how you move through the space.
Once construction begins, moving a gas line or a drain pipe is difficult. Rerouting gas or waste lines should be left to a licensed professional. Decide exactly where these heavy-use items will go.
Plan the dishwasher placement at the same time. The National Kitchen & Bath Association (NKBA) publishes planning guidelines for this. NKBA recommends placing the dishwasher within 36 inches of the nearest edge of the cleanup sink.
Check this detail in their Kitchen Planning Guidelines. Setting these utility locations early tells the plumber exactly what to rough in behind the walls.
4. Plan lighting and outlets with the electrician
Good lighting requires wiring decisions before the drywall goes up. Walk through the bare room with your electrician. Mark exactly where lights belong. You need bright task lighting over the counters and the stove.
Shadows make it hard to chop vegetables safely. Add ambient lighting for the whole room. This is the time to decide on under-cabinet lights. You might also want pendant fixtures over an island.
You also have to place electrical outlets. Building codes set how far apart outlets can be along counter spaces, and the exact numbers depend on the code edition your area has adopted.
Always check your local building department for the code edition and local amendments. Rules vary by town and dictate where you can place receptacles. Tell the electrician where you plan to plug in the coffee maker or toaster oven.
5. Decide how the range will be vented
Cooking generates heat, moisture and grease that need an escape route. You have to decide between a hood that vents outside or a recirculating fan. NKBA recommends a ducted hood, which sends that air outdoors instead of blowing it back into the room.
The NKBA guidelines, whose code notes are based on the 2015 International Residential Code (IRC), recommend a specific air volume. They suggest a ducted range hood of at least 150 cubic feet per minute. They also cite a minimum of 100 cubic feet per minute for a ducted hood vented outside, from that 2015 model code, which your state or town may have adopted in another edition or with changes. Ask your local building department which applies.
Routing the ductwork takes space in the ceiling or walls. The pipes have to travel from the stove to an exterior wall or the roof. Your contractor needs to know this plan before framing begins.
6. Map out your storage
Determine what goes inside the boxes before you buy them. A kitchen functions better when specific items have designated spots. Group your pots near the stove and your flatware near the dishwasher.
Drawers offer easier access to heavy pots than deep base cabinets. You avoid kneeling on the floor to reach the back of a dark shelf.
Pull-out trash bins and corner organizers require specialized cabinet frames. Talk through your storage needs with your designer. Plan where the baking sheets will go. Decide if you want a tall pantry cabinet for dry goods.
Changing storage choices after the order goes in can mean sending custom boxes back, which slows the project. Decide on the internal organizers before the order goes in.
7. Pick finishes before the first bid
Select your flooring, counters, backsplash tile and paint colors early. Having exact material choices allows contractors to give you accurate bids. If you ask for a price before picking a countertop, the bid includes an allowance.
Allowances often fall short of the actual material price later. You might end up paying extra out of pocket.
Choosing a heavy stone counter might require extra base support. Picking large floor tiles can change what the installer needs to do. A complex backsplash pattern takes more labor hours to install than standard subway tile.
Settle on your finishes up front to get a realistic number. This helps you build a solid renovation project budget line by line.
8. Settle who does what on the job site
Be clear about who will perform the labor. You might hire a general contractor to run the whole project. This person handles the schedule and manages the trades.
You might act as your own project manager and hire plumbers directly. Some homeowners decide to handle demolition or painting themselves. This reduces the labor costs if you have the time.
Put the exact division of labor in writing. Your contractor needs to know if you plan to rip out the old cabinets. Agreeing on these roles prevents scheduling delays.
It stops disputes over incomplete work. Everyone knows what they have to finish before the next person starts. If you plan to bring in outside help, take time to hire a contractor properly.
9. Decide who pulls the building permit
Major kitchen work often requires a permit from the local building department. Decide whether you or your contractor will file the application. Contractors often pull the permit for the work they perform, though practice varies.
The person listed on the permit acts as the primary contact for city inspectors. That person answers questions about the plans.
Pulling it yourself means dealing with the paperwork directly. You will have to draw up the diagrams and pay the fees at the municipal office. You will also have to schedule the inspection visits.
Have a conversation with your builder about who submits the plans. Check your local building department for the specific permit rules. These rules vary by area. Some towns require the licensed tradesperson to pull their own plumbing and electrical permits.
10. Check for lead paint in older homes
Houses built before 1978 often contain lead paint. Sanding or tearing out old walls can release harmful lead dust. This dust can settle on floors and spread through the house.
Have a trained professional test the surfaces for lead paint before demolition starts. Your contractor may be able to arrange the testing. Knowing the results early helps you plan the tear-out safely.
The EPA requires anyone paid to disturb painted surfaces in homes built before 1978 to be certified. This falls under its lead renovation rule. Choose certified professionals who know how to contain the dust safely.
They use specific methods to protect your household during the work. They contain the dust and clean up thoroughly. Leave this hazard to the professionals who have the right training.
11. Set up a temporary kitchen
A remodel puts your main cooking space out of action for weeks. You need a daily plan for feeding your household. Set up a temporary kitchen in the dining room or basement.
Move the old refrigerator there if possible. A full-size fridge holds more fresh food than a small cooler.
Set up a microwave or a hot plate on a sturdy table. Keep the coffee maker and some simple utensils nearby. Plan how you will wash dishes without a kitchen sink. Many people use the bathtub or a laundry basin.
Having this setup ready reduces stress while you wait.
More for this project
Is refacing kitchen cabinets worth it over replacing them
Decide if kitchen cabinet refacing makes sense for your home by reviewing the required materials, layout changes and when to replace completely.
Standard kitchen cabinet sizes to plan your layout around
Plan your layout using the standard cabinet sizes for kitchen renovations and learn exactly how base, wall and tall units fit together along a wall.
How to sketch your kitchen plan before you meet a designer
Using a free kitchen design tool lets you check clearances before hiring a pro. Learn how to measure your room and map out a layout that actually works.